Showing posts with label party planning. Show all posts

Tuesday, July 3, 2012

My Birthday Bash

On June 9th, I threw myself a birthday party! Why not right?? All that week I was checking the weather, praying for sunshine. Most of the week, the forecast for Saturday was rain. As we approached Saturday, the odds kept getting worse and worse. Until Friday, all of a sudden my prayers were answered and the forecast was Sunshine and warm! Yay! And that's exactly the weather we had. It was a beautiful sunny day. Not too hot and humid. Just right for a party outdoors. Here's what I served my guests!


Strawberry Peach Sangria! It was sooooo good!

Mini Hot dogs! So cute! (didn't even know they sold mini buns!)

Sliders! (I love mini food)

Anti-pasto skewers

Other foods included: 2 pasta salads, a green salad, potato salad,
veggie w\ dip, chips, Portuguese chicken

Beautiful bouquet of flowers from Hubby! Made the table so colorful!

Bucket of bubbles for the kids! They went FAST!
And for dessert, a veggie plate...

...cake batter rice crispie squares...

...candy...

...more candy...

...a yummy plate with nuts,etc which my uncle brought!

And of course, my annual birthday Strawberry cheesecake (thanks dad!)..


It was a really nice day filled with yummy food, family and fun times! I love parties and party planning. It's a lot of work, but its all worth it when it's all said and done! :o) Thanks to everyone who made my day a special one!

Ni-xox-

Monday, October 31, 2011

Glam Skull Centerpiece Tutorial

Here's what you'll need for this project:
Skull
Silver dish (mine was a plastic one from the dollar store)
Clear Glue
Paint Brush
Silver Paint
A small dish
Silver Glitter (mine was more or a dark grey)
Silver candelabra
Glue gun
Black tinsel garland (Or a black feather boa...couldn't find one for cheap)

First, paint the skull silver. Let dry. Then paint the skull with the clear glue and pour the glitter all over, covering the surface completely. Let dry (preferably overnight).

Heat up your glue gun. Glue the silver plate to the candelabra.

Glue the glittered skull in the center of the silver plate. Then glue the black tinsel garland around the skull (the garland may be too long, just trim off what you don't need). You can embellish with silver spiders if you like.
 
Sorry for the crappy picture, my camera sucks!


And there you have it. A very glittery, very glamorous centerpiece for your table of goodies this Halloween!
Hope you try making these easy DIY projects. I encourage you to embellish and add your own signature look. Enjoy!

Ni-xox

Thursday, October 27, 2011

Easy Elegant Halloween Candle Holder Tutorial

I've really been into DIY lately. Unfortunately, with a baby, it's not always easy to make time. What I've learned is to DIY slowly. Don't expect to sit there for hours and craft or bake. Little bits at a time and you can achieve a lot more and make it look great. Here is one of my latest DIY that I created for the Halloween party we're throwing this weekend. Enjoy!


This is what you'll need for this project. (Oh and thin and wide black ribbon which I forgot to add to this pic)

First, heat up your glue gun. Measure a piece of your web ribbon so that it fits around your vase and overlaps a very little bit. Run a bead of hot glue down one half of the vase and stick your web ribbon around the vase.

Do the same with the top half of you vase. If the ribbon 's width isn't exactly half the length of the vase or is longer, don't worry. The ribbon can overlap or be short a little bit as we will hide the seam later. My ribbon happened to be exactly the size of the vase by coincidence. If I would have tried to make it that way, it would have never worked. You know how it is!

Here's where the hiding the seam comes in. Take a length of wide black ribbon that fits round the vase. On the seam side of the vase (I mean the seam going up and down), run a small bead of hot glue and glue your black ribbon around the vase to hide the gap or overlap between the web ribbon.

Then glue a piece of silver ribbon over the wide black ribbon for embellishment. Don't forget to always put the glue on the seam side of the vase so that all the glue lines are on the same side.
After gluing the silver ribbon, glue a thin black ribbon on top and bottom of the vase to finish the edges. Again, always gluing on the seam side of the vase. All your glue should be lined up in the back so that you can turn the vase around and hide all your glue lines. (I know I keep repeating myself, but it'll end up a nicer end product)


And voila!! Just add a small candle in the vase and you have yourself a beautiful addition to your Halloween decorations. Stay tuned for my Glittered skull centerpiece tutorial.

Ni-xox-

Thursday, September 29, 2011

Baby's First Birthday Party!

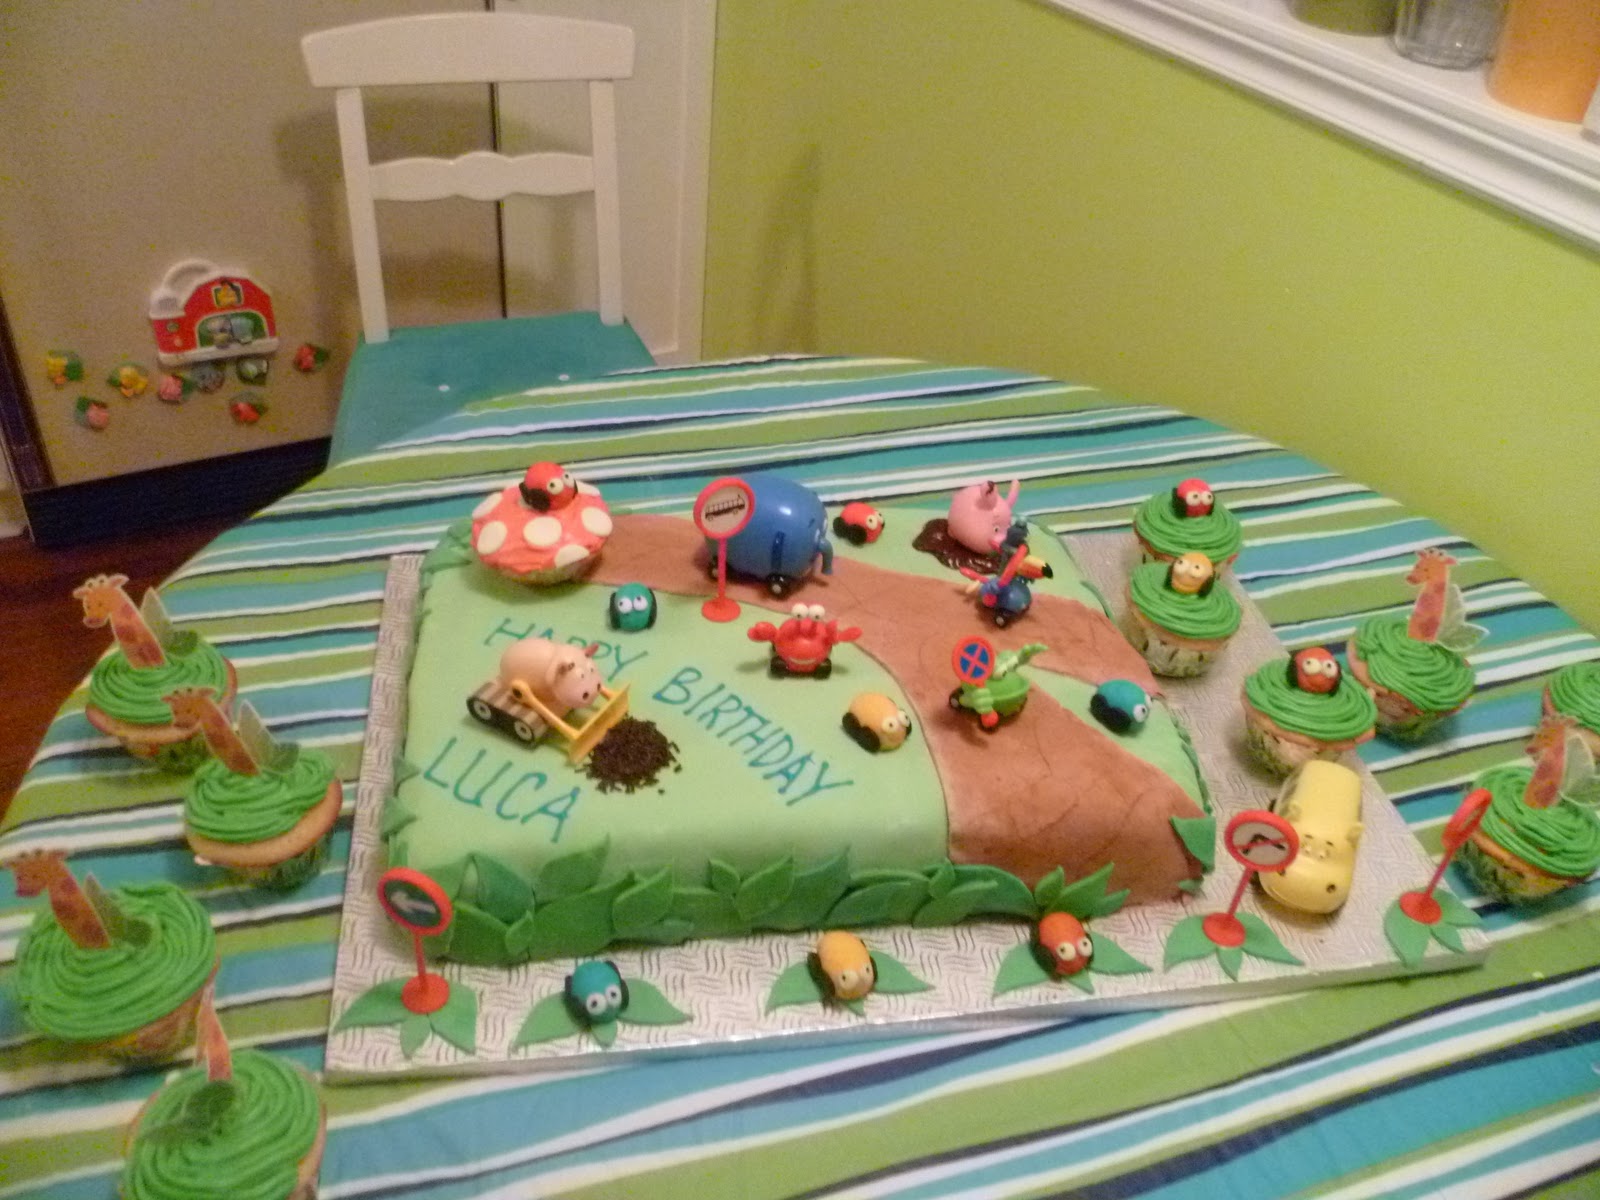
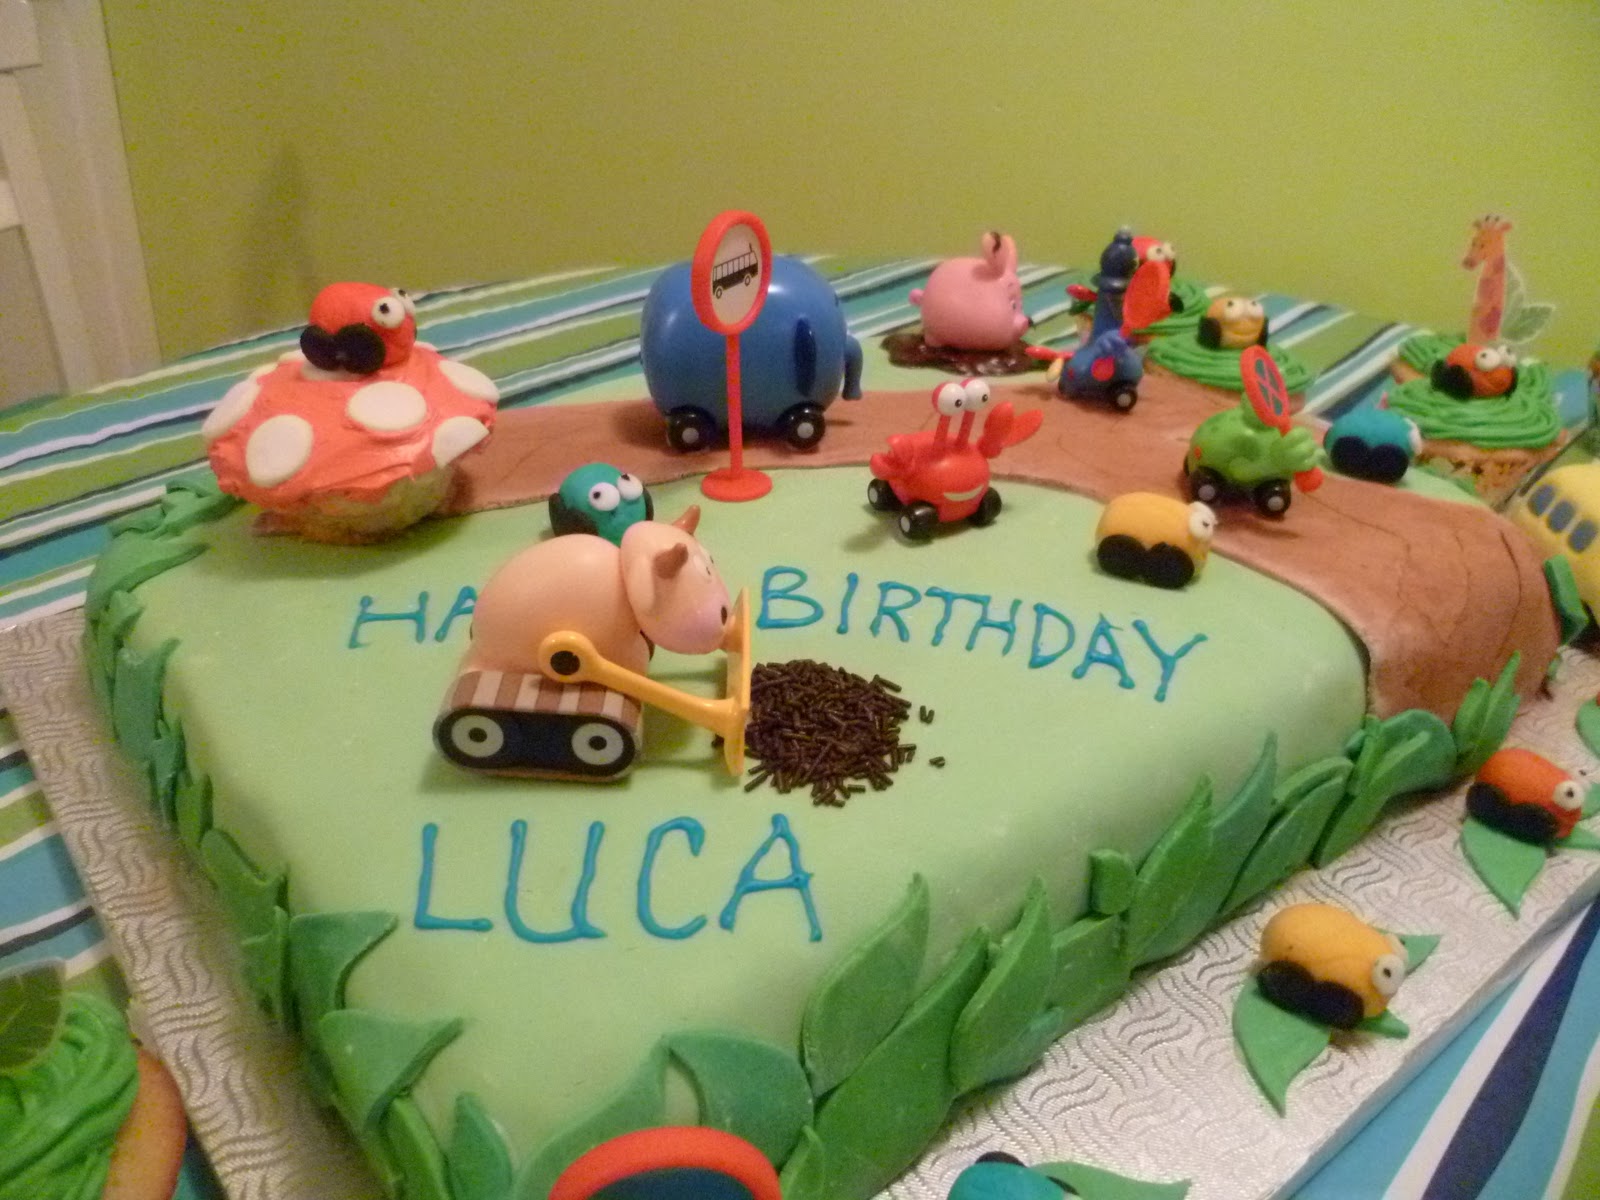
Two weeks later I'm finally posting baby's first birthday party. It was on Saturday, September 17. The day before, mom and I made the cake. It took us allllll day. It was a double chocolate cake, with chocolate ganache filling, topped with vanilla butter cream and homemade vanilla fondant. Yum right?? I decided to go with a jungle theme for the whole party. This summer in Portugal while we were doing some groceries, I spotted the whole collection of Jungle Junction toys. They don't seem to have them here in Canada, so naturally I was excited and bought everything. Then I thought of the brilliant (at least I thought so), of using the toys on the birthday cake. And that's how this theme was born. So without further adue, here is our beautiful masterpiece. So excited and proud about it!


I also made a batch of vanilla cupcakes with a butter cream frosting. I really wanted baby to make a mess with his cake, but fondant isn't really messy. So I figured the green frosting on the cupcakes should do the job! I found these cute cupcake liners and toppers to go with my theme.


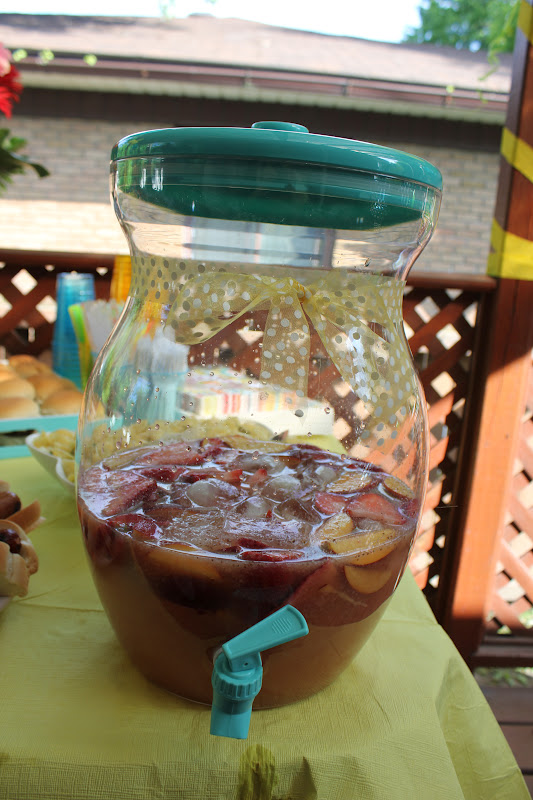
As for the food, I made a big lasagna, pulled pork sandwiches (which were a big hit....I love me slow cooker!), chicken from the Portuguese place, spinach/feta quesedillas, Quinoa Salad, Green Salad, potatoes, pizza and some other little side dishes. Everything was delicious. Not too many leftovers....awesome!


All day I was trying to get a good picture of me and the birthday boy. This is the best we got. Eh!


Here he is having fun at his party and we had't even had cake or opened presents yet!


The birthday boy and his Uncle Joe (althought he looks more interested in the monkey).


I'm really happy at how all the decorations turned out. It was a realy jungle in here. I ordered balloons of monkeys and giraffes. I had an inflatable monkey hanging off the chandelier. Lots of green and orange streamers everywhere and lots of balloons. It was really festive.


Not so successful on trying to get a picture of the birthday boy in his party hat. Actually forget being successful on the picture, we werent even successful on getting the hat on! LOL!


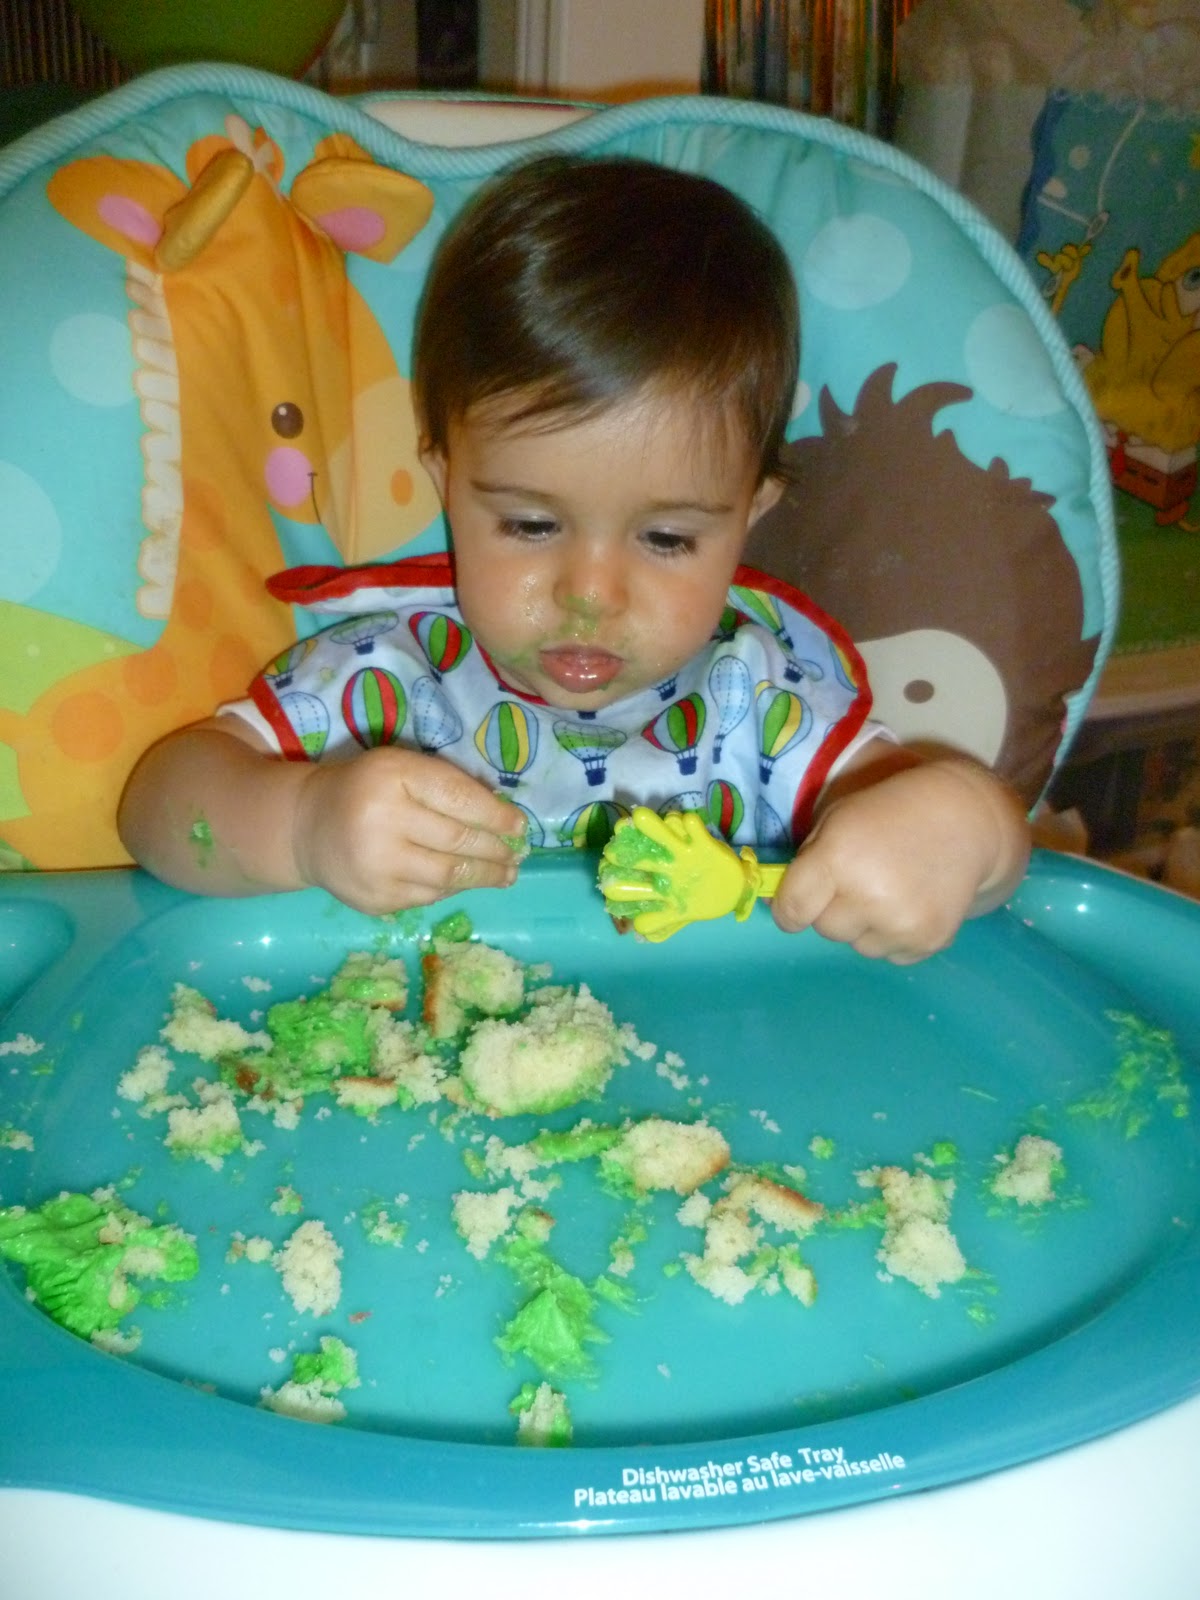
And now for the moment you've all been waiting for! Cake time!!! YUM! I wasnt sure what he would do. The last couple of first birthdays I've been to, the kids werent interested in the cake. I really wanted baby to smush it all in his face. And guess what....HE DID!! YAY! I actually still found some frosting on his highchair yesterday!


Of course the first picture I go to take of the birthday boy and daddy was beautiful! LOL! How about mommy... :o( LOL!


There were some older kids at the party, so we decided to have a pinata for them. It was fun. They loved it! Of course, why wouldnt they? Swinging a broom stick around, trying to hit a colorful snake and then the best part, the candy and toys that fall out! Awesome! Baby didnt really enjoy himself at this point....a little scared of the noise.


In the end, I finally got a pretty nice picture with hubby and Mr. Birthday Boy! My little family!


Present time! Baby got lots of nice toys. Of course at the time he was more interested in the tissue paper and bags that the gifts came in. Thats kids for you!


I guess he really liked the next gift....he went to sit right on it!! LOL!


All in all, the party was a great success. A very memorable first birthday party for my first baby!
Mommy Loves you!

I guess he had fun at his party. Here he is the next day! POOPED!

   Ni aka Mommy -xox-